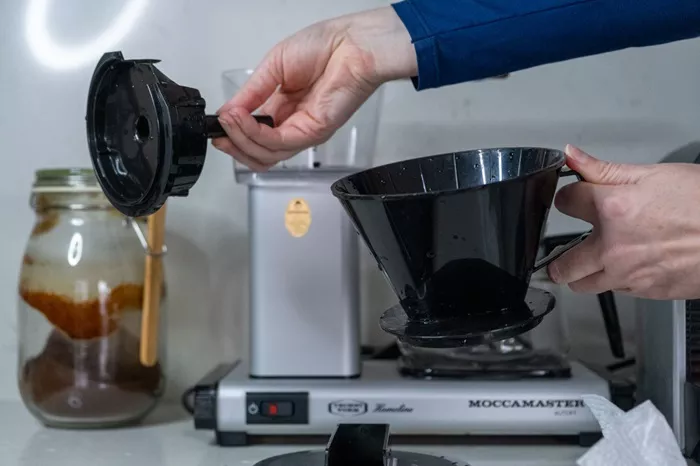
Cleaning your coffee maker is essential for maintaining its performance and ensuring that your coffee tastes great every time. Here’s a comprehensive guide on how to clean your coffee maker, including detailed steps, tips, and common mistakes to avoid.
Why Cleaning Your Coffee Maker Matters
Regular cleaning keeps your coffee maker in top shape. It prevents the buildup of coffee oils and mineral deposits that can affect the flavor of your coffee. Additionally, a clean coffee maker runs more efficiently and lasts longer.
Supplies You Will Need
- Mild dish soap
- White vinegar
- Baking soda
- Soft cloth or sponge
- Clean water
- Small brush or toothbrush (optional)
- Paper towels
Daily Cleaning Routine
1. Turn Off and Unplug
Always turn off and unplug your coffee maker before cleaning. This ensures safety and prevents any accidental electrical issues.
2. Empty the Basket
Remove the coffee grounds from the basket. If your coffee maker uses paper filters, discard the used filter. If you use a permanent filter, rinse it out.
3. Wash the Carafe and Lid
Use mild dish soap and warm water to clean the carafe and lid. Scrub with a soft cloth or sponge to remove coffee stains and oils. Rinse thoroughly with clean water.
4. Clean the Basket
Wash the coffee basket (where the filter sits) with mild dish soap and warm water. Use a brush or sponge to get rid of any coffee residue. Rinse well and let it dry completely.
5. Wipe Down the Exterior
Dampen a soft cloth with warm water and mild dish soap. Wipe down the exterior of the coffee maker to remove any coffee splashes or stains. Avoid using abrasive cleaners or scrubbing pads.
Weekly Cleaning Routine
1. Prepare a Vinegar Solution
Mix equal parts of white vinegar and water. This solution helps to remove mineral deposits and scale buildup inside your coffee maker.
2. Run the Vinegar Solution
Pour the vinegar solution into the water reservoir. Start a brew cycle without adding coffee grounds. Let the solution run through the machine.
3. Let It Sit
After the vinegar solution has run through, let the coffee maker sit for about 30 minutes. This allows the vinegar to break down any remaining mineral deposits.
4. Rinse with Water
Fill the reservoir with clean water and run a brew cycle. Repeat this process at least twice to ensure that all vinegar residues are removed.
5. Clean the Carafe and Basket
While the coffee maker is running the water cycles, clean the carafe and basket again as described in the daily cleaning routine.
See Also: The 8 Best Keurig Coffee Makers of 2024
Monthly Deep Cleaning
1. Use Baking Soda
For a thorough clean, mix 2 tablespoons of baking soda with 1 cup of water. Pour this mixture into the water reservoir.
2. Run a Brew Cycle
Start a brew cycle with the baking soda solution. This helps to remove any stubborn stains and odors inside the coffee maker.
3. Let It Sit and Rinse
Let the baking soda solution sit for about 30 minutes. Afterward, run several cycles of clean water through the machine to remove any baking soda residues.
Cleaning Specific Parts
1. Water Reservoir
Regularly clean the water reservoir with mild dish soap and water. Use a brush to reach any corners where mold or mildew might develop. Rinse thoroughly.
2. Drip Tray
Remove and clean the drip tray with warm soapy water. Rinse and dry it before placing it back.
3. Heating Plate
Wipe the heating plate with a damp cloth to remove any coffee spills or stains. Be cautious to avoid getting any water into the internal components.
4. Coffee Maker Filter
If your coffee maker has a permanent filter, clean it thoroughly with warm water and mild dish soap. Ensure it dries completely before reusing.
Common Mistakes to Avoid
1. Using Abrasive Cleaners
Avoid using harsh or abrasive cleaners, as they can damage the coffee maker’s surfaces.
2. Skipping the Rinsing Process
Ensure you rinse the coffee maker thoroughly after using vinegar or baking soda to prevent any residues from affecting the taste of your coffee.
3. Neglecting Regular Cleaning
Adhering to a cleaning schedule is crucial. Regular cleaning prevents the buildup of coffee oils and mineral deposits that can impact your coffee’s flavor and the coffee maker’s performance.
Additional Tips
1. Check Manufacturer’s Instructions
Refer to your coffee maker’s user manual for specific cleaning instructions and recommendations. Different models may have unique cleaning requirements.
2. Use Filtered Water
Using filtered water can help reduce mineral deposits in your coffee maker and improve the taste of your coffee.
3. Store Properly
If you’re not using your coffee maker for an extended period, store it in a dry, cool place. Ensure all parts are completely dry before storing to prevent mold growth.
Conclusion
Keeping your coffee maker clean is vital for enjoying great-tasting coffee and extending the life of your appliance. By following these cleaning routines and tips, you can ensure that your coffee maker remains in excellent condition. Regular maintenance will keep your coffee tasting fresh and your coffee maker performing optimally.
With consistent cleaning, your coffee maker will continue to brew delicious coffee for years to come. So, make cleaning a regular part of your coffee routine and enjoy every cup of coffee to the fullest.


